Posted in技術情報
超音波レシーバはどんな波形を受け取っているのか
超音波距離センサでは、短い超音波バーストを発生して受け取った音波の時間差から対象物の距離を計算しますが、そんな仕組み上複数のセンサが混在している環境では誤動作が起こりそうです。センサごとに音波を変えたりして何とか識別した…

ソフトウェアを書く方は、「やーそれラズパイ買ってきてちゃちゃっとデモしちゃいましょうよ」というようなことを一度や二度は口にしたことがあるんじゃないでしょうか?僕はあります。でもいざやってみると、SD Card に乗ってるシステムって怖いんですよね。いつ飛んじゃうのかと。そして、近頃もラズパイで楽しく遊んでみようと思ったらやはりシステムが飛んでしまいました。まあただの設定ミスかもしれないんですけど。それで、本格的に遊んでみる前に、以前からかねての疑問「そもそもラズパイには何の SD Card を使ったらいいの?」についてまじめに取り組んでみました。
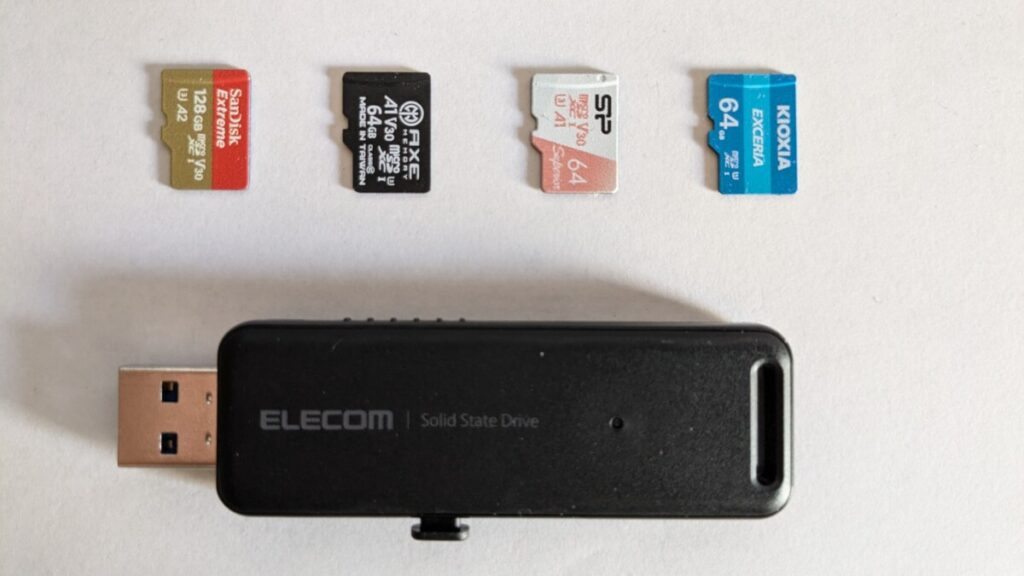
SD Card の規格、超わかりくくないですか?こんなのとか。
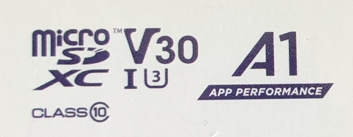
「え?class 10? V30? U3? A1? なにそれ?」と思ってしまいます。買うとき毎回です。
調べた結論から書いてしまうと僕の考えは「SD Card を使うなら A2 クラスが良い。ほかのあれこれは無視してOK」です。でも「むしろ SD Card は使わないで SSD を使った方がいい」とも思うんですけれども。なんでそう思うのか興味があったら続きを読んでいってください。
前回の記事 Raspberry Pi で DPDK は使えるか? の続きです。いきなり始めたこの話題ですが、そもそも DPDK とは何でしょうか?Wikipedia の説明が良くまとまっていてわかりやすいです。Data Plane Development Kit の略で、データプレーンを扱うアプリケーションを書くためのライブラリです。
8/19 もうちょっと色々わかったので追記しました。
かなり以前に Raspberry Pi で DPDK を走らせようとして挫折したのですが
それから7年も経っているし、状況は変わっているでしょう。再挑戦してみます。